Wednesday, November 10, 2010

Measuring Volume Of Liquid : Introduction


Mathematics is an important subject that every student must master. We need Mathematics in every activity that we do in our daily life. We need to count the money at the cashier, we need to estimate which product is a bargain in the supermarket, we need to estimate the amount of fuel that we use etc.
This is one of the reasons that we need to start learning Mathematics from an early age. In our early childhood we have been exposed to basic mathematical concept. Capacity of the container is one of the basic mathematical ideas that students need to learn.
Most of the time students will relate the size of the object such as height and diameter with the capacity of the object. Most of the time, this estimation would be correct. However, when we are comparing container with different shapes, this kind of observation might not get the correct answer. 
Measuring Volume Of Liquid : Video Clip


This is a video found in Youtube. In this video, students are introduced to different kinds of equipment used to measure liquid. There is a detail explanation about the use of each measuring instrument. The video shows the calibration on each of the instrument. Every instrument has its specific use. Some of the instruments are more accurate and more suitable to be used to measure the volume of liquid. Others are more suitable to hold the liquid even though there is calibration on it. We need to choose these instruments carefully when we need to measure volume of liquids.

Measuring Volume Of Liquid : Teaching Aids


Teaching and learning process would be more meaningful if we can associate it with our daily life. Students are able to understand better with something that they used to see everyday. Moreover, they can remember it better because they really understand why they have to learn the lesson.
There are two sets of teaching aids suggested here. The first set of teaching aid would include the packaging of fresh milk that we can get from any supermarket. Fresh milks come in different packaging. Some of them are in bottles and others are in packets. For young children they like to drink milk and these are something that they are familiar with. The packaging comes in different sizes as well. Teacher will have to prepare the containers of fresh milk before entering the class. The preparation of these teaching aids does not need any extra budget as most of us drink milk and we just have to collect the containers and clean them properly before giving to students. 

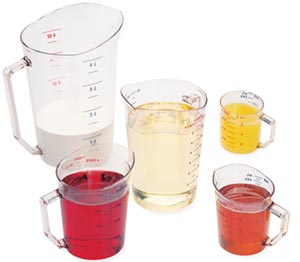
The second teaching aid would be the different sizes of beakers that we have in school labs. These beakers are properly calibrated. It is a good instrument to introduce students to the concept of volume of liquids. It is easier for students to understand when we use instrument with the same shape but different in size. They have no problem in relating the size of the object and its capacity to hold liquid. However, they might have the wrong perception that the higher the liquid in the container means the higher the volume of the liquid in the container. This is the misconception that teacher needs to show the students. 
Teaching Aid : Milk

Teaching Aid : Beakers

Measuring Volume Of Liquid : Teaching Activities (I)


This activity involves the use of beakers with different size. The activity is very simple and most of the students are able to follow the instructions. First, students will be divided into groups. Then each group will be given four beakers with different size. The beakers will be labeled from 1 to 4 with 1 is the smallest and 4 is the biggest. Then students are instructed to pour 20 ml, 30 ml, 40 ml and 50 ml into each of the beakers accordingly.
Then students are required to observe the height of the water in each of the beakers. Students need to arrange the beakers according to the height. Teacher asks students to point out the beaker with the highest volume of liquid in it. Teacher would like students to observe that beaker with the highest volume of liquid in it does not mean that the liquid must be the highest in the beaker in height.
For high achiever, teacher may ask them to pour the liquid in each beaker to the same height and take the reading of each of the beakers. Students will find out that with the same height of liquid in the beaker, the bigger beaker has the highest volume of water.

Measuring Volume Of Liquid : Teaching Activities (II)


In this activity, students are required to work in pairs. Each pair of students will be given two containers of fresh milk, one in packet and one in bottle. Apart from that they will be given two measuring cylinder as well.
For the first step, students need to fill up the container to the full with water. Then students have to pour the water carefully into the measuring cylinder. They need to make sure that no water is spilled. After that, each student in the group would have to record the measurement of their container. They have to compare the measurement with their partner. Then they can decide from the measurement which container has the bigger capacity.
After that, students are required to compare the height of the container. They would be able to observe that even though the containers may have the same height but they have different capacity.